


First, here is how my finished blocks look...
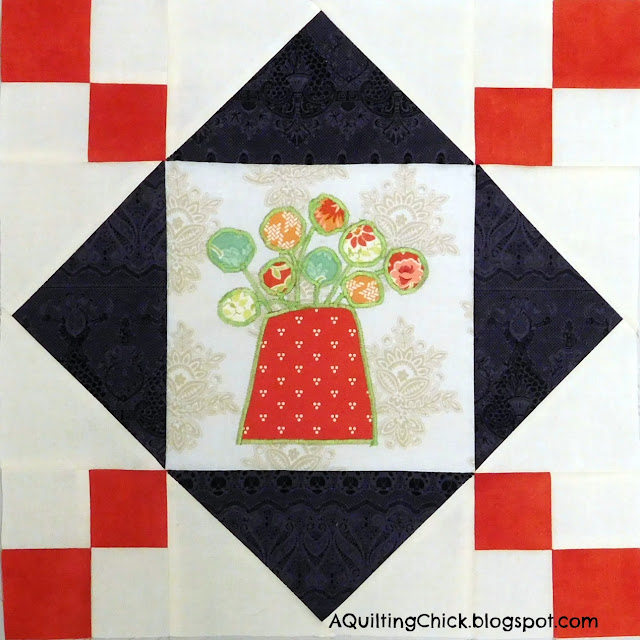
The Splendid Sampler blocks finish out at 6". I need a king size quilt so that just wasn't going to work. Also, I didn't want to wait until I had 100 of these things waiting and then have to go back and finish them to make a quilt. Therefore, I designed my own setting for the blocks so I can make them as I go. For those of you interested in following my example, here's a quick tutorial!
Yardage Requirements
Red 2-1/2 Yards
Black 4-1/2 Yards
White 7-3/4 Yards
Yes, that's a lot of fabric. But remember, we're making this a king size quilt and it will be king size, 120" x 120".
Cutting Instructions
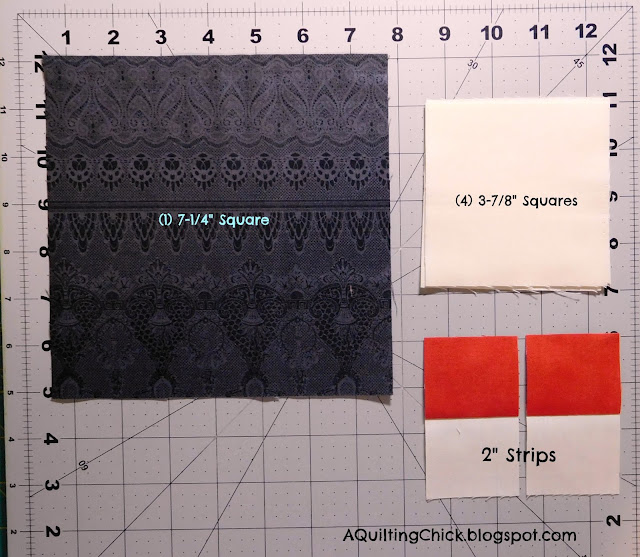
Each block will need (1) 7-1/4" square of black, and (4) 3-7/8" squares of white. You'll need (1) 2" strip of the white and red to make your strip sets.
Assembly
Let's start with the 4-patches. Sew your 2" strips of white and red together using 1/4" seam along the long side of the strips, right sides together. Press open. Then subcut into 2" units. You'll need 8 units per block.
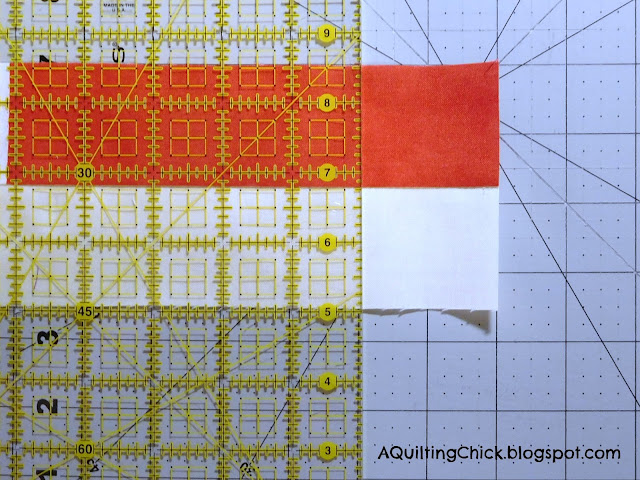
Then arrange 2 of these units into a 4 patch. Pin and sew. Make (4) 4-patch units.

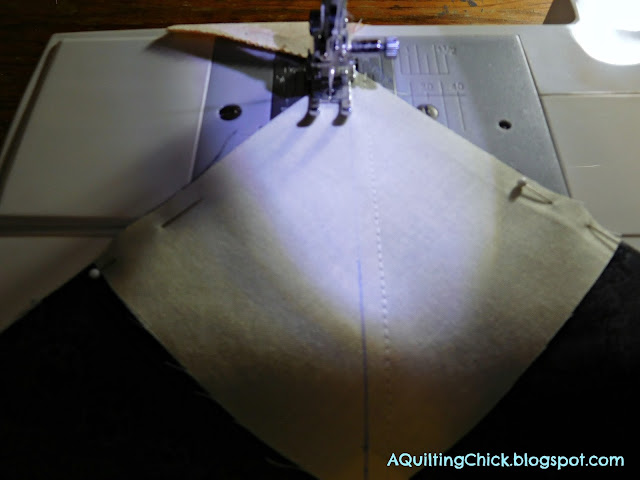
Now we'll start the flying geese. I always use the no-waste flying geese method. We start with the 7-1/4" black square and (4) 3-7/8" white squares. Draw a diagonal line on the back of the white squares. Lay two of the white squares on top of the black square as shown and pin in place.

Y'all, the pinning to me is critical. See where I have my pins placed? When you are dealing with larger squares of fabric, you'll have some serious shifting issues if you aren't careful. This is how I pin to get the best results.
Next we're going to sew a SCAN 1/4" seam on each side of the drawn line.
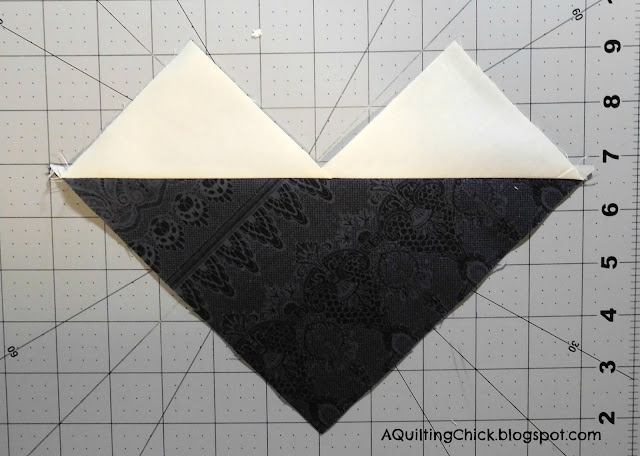
When you're done, take it back to the cutting board and cut along the drawn line.

Now you're going to press it open. You'll have two units that look like this...
Now we're gonna pin again. Pin another white square on top of each of the units as shown. Again, note the pinning...
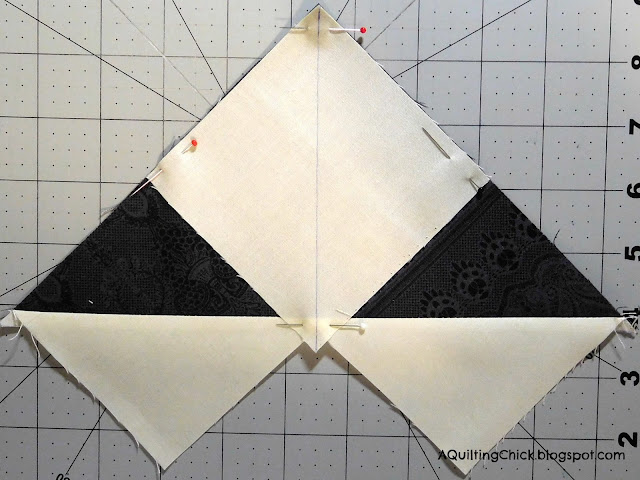
Again, sew a SCANT 1/4" seam on both sides of the drawn line then bring back to the cutting board and cut on the drawn line.

Press them open. You'll have 4 flying geese units. Go ahead and trim them up to 3-1/2" x 6-1/2".

And you have the block units finished! Now let's lay them out...
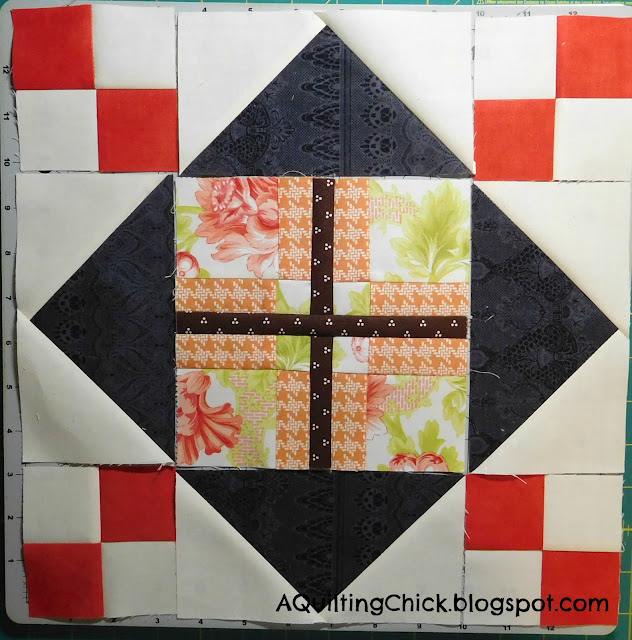
And sew them all together! I love how stunning this looks already, don't you?

If you use my setting, I'd sure love to see it! Please be sure to share and if y'all have any questions, please let me know!
Thank you. Love this.
ReplyDeleteThanks for the tutorial - they go so well with the colours you've chosen for your blocks. Up to now I've not made any S.S. blocks, but I'm collecting all the patterns and some of the lovely finished blocks, for inspiration. Some day soon I hope to start sewing again but I'll only make the blocks I really like. I love what you've done up to now :)
ReplyDeleteI have soooo admired your setting. Thanks so much for sharing!!!
ReplyDeleteThanks!!
ReplyDeleteThank you so much for sharing this fabulous idea. I am doing most of the blocks at 12" and am making baby quilts as I go. I am currently working on my second quilt (9 blocks) and have used different joinings. I think this will work for my few 6" blocks.
ReplyDeleteThis looks great - thanks for sharing.
ReplyDelete